Published on : 10 Jan 2026
By Travel Tourister | Expert Mountain Guide Series
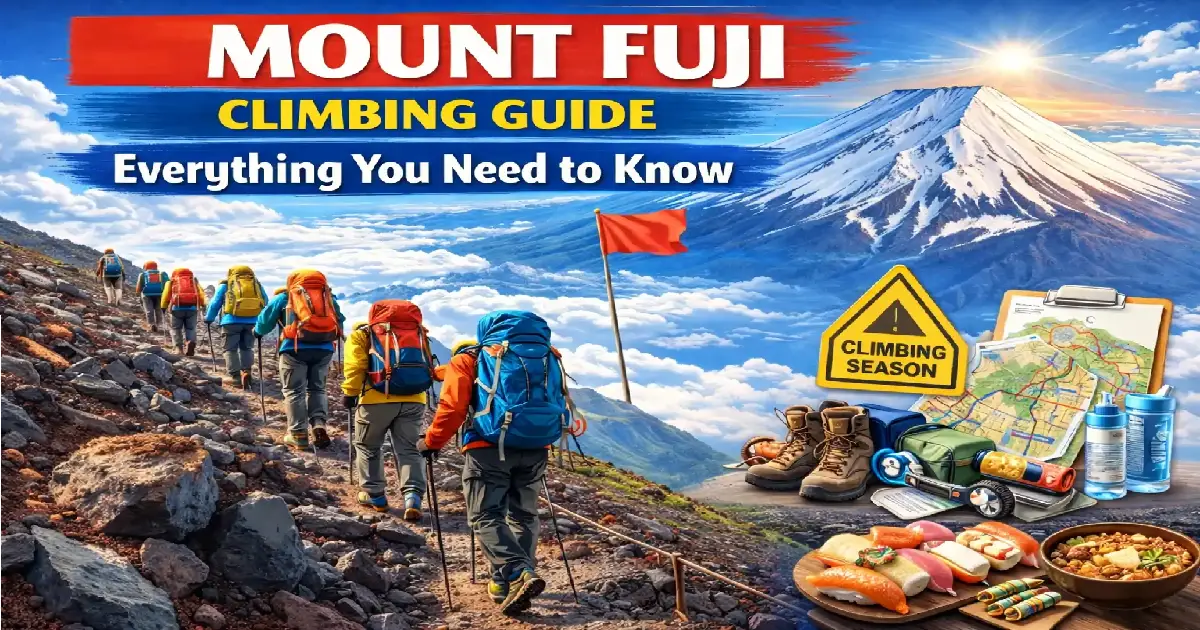
Standing at Japan’s highest peak at 3,776 meters isn’t easy—but it’s simpler than you think. Over 200,000 climbers from around the world summit Mount Fuji annually, and contrary to popular belief, this isn’t technical mountaineering requiring ropes or crampons.
I’ve guided dozens of international travelers up Fujisan (as locals call it) over the past decade. Some arrived overconfident wearing sneakers and t-shirts; others showed up overprepared with ice axes for a summer hike. The truth sits somewhere between these extremes.
This Mount Fuji climbing guide 2026 cuts through the myths and provides exactly what you need—no more, no less—to safely reach Japan’s sacred summit. We’ll cover the new regulations implemented in 2025 that fundamentally changed how climbing works, the gear that actually matters versus marketing hype, and timing strategies that make the difference between magical experiences and miserable slogs.
Whether you’re a seasoned hiker or attempting your first significant climb, understanding what you’re truly signing up for separates successful summits from halfway abandonments. Let’s start with what’s actually changed.
As of 2025, all climbers pay a mandatory ¥4,000 ($27) entry fee at the 5th station trailheads. This isn’t optional—gates physically block trail access, and payment is required to pass.
Cash only. No credit cards, no mobile payments, no exceptions. ATMs exist at the 5th stations, but lines form during peak hours. Bring exact change to expedite gate passage.
The fee supports trail maintenance, mountain hut infrastructure, emergency services, and environmental preservation. Your payment includes basic rescue insurance, though comprehensive travel insurance remains essential.
Here’s where it gets complicated. Trail gates close from 2:00 PM until 3:00 AM the following morning—but with important exceptions.
If you have mountain hut reservations: You can pass through gates during restricted hours by showing your reservation confirmation.
If you don’t have mountain hut reservations: You cannot start climbing after 2:00 PM or climb during nighttime hours. Day hikers must complete their entire climb (ascent and descent) between 3:00 AM and 2:00 PM.
This regulation specifically targets “bullet climbing”—the practice of ascending straight through the night to reach sunrise without sleeping. Authorities blame bullet climbing for increased accidents, altitude sickness, hypothermia, and trail congestion.
The most popular Yoshida Trail now limits access to 4,000 climbers daily. When capacity reaches this threshold, only climbers with mountain hut reservations can proceed beyond the 5th station.
During the 2024 season, this cap was never actually exceeded—not even on peak weekends. However, the system remains in place for particularly busy days.
Other trails (Fujinomiya, Subashiri, Gotemba) currently have no daily limits, making them attractive alternatives during peak season if you’re flexible about routes.
Climbers using Shizuoka Prefecture trails (Fujinomiya, Subashiri, Gotemba) must complete online pre-registration before climbing. The system opened in May 2025.
Registration requires:
The process takes 20-30 minutes. Complete it at least 24 hours before your planned climb to avoid last-minute registration issues at the trailhead.
Yoshida Trail (Yamanashi side): July 1 – September 10, 2026 (tentative)
Fujinomiya, Subashiri, Gotemba Trails (Shizuoka side): July 10 – September 10, 2026 (tentative)
Opening dates depend on snow conditions and trail safety assessments. Official announcements typically arrive in June. Closing dates remain firm—trails shut down in early September regardless of weather.
Off-season climbing isn’t just discouraged—it’s genuinely dangerous and often illegal. Here’s why:
Mountain huts close completely. No shelter, no emergency aid stations, no water refills, no food. You’re entirely self-sufficient in alpine conditions.
Trails aren’t maintained. Snow and ice cover paths. Signage gets buried. Route-finding becomes challenging even for experienced mountaineers.
Weather turns severe. October through June brings extreme winds (100+ km/h gusts), temperatures below -20°C, heavy snowfall, and whiteout conditions. Avalanche risk exists in specific areas.
No emergency services. Rescue operations become exponentially more dangerous. Helicopters can’t always fly in winter conditions.
Fines and penalties. Local authorities can fine unauthorized climbers. More importantly, if you require rescue, you bear full costs—potentially hundreds of thousands of dollars.
I’ve seen winter Fuji from a distance. It’s stunning, yes, but it’s a completely different mountain requiring technical mountaineering skills, specialized equipment, and winter alpine experience. The summer “hike” transforms into a serious expedition.
The Obon holiday week (mid-August) creates the year’s most congested period. Japanese families flood trails during school summer vacations, combining with international tourists for maximum crowding.
Expect:
Advantages:
Many climbers actively seek this busy atmosphere. There’s something uniquely powerful about ascending alongside hundreds of fellow adventurers from every continent, all pursuing the same dawn goal.
Early July (July 1-15) and early September (September 1-10) offer compelling advantages for those who can schedule flexibility.
Early July Benefits:
Early July Challenges:
Early September Benefits:
Early September Challenges:
I recommend early July for experienced hikers comfortable with variable weather. First-timers might prefer late July for maximum support infrastructure and community experience.
Mount Fuji creates its own weather systems. Conditions change rapidly and dramatically—sunny skies at the 5th station don’t guarantee summit clarity.
Temperature gradient: Expect roughly 6°C temperature drop per 1,000 meters elevation gain. If the 5th station sits at 20°C, the summit likely measures 5-8°C during daytime. Night temperatures at the summit regularly drop to 0-5°C even in August.
Wind exposure: The summit stands completely exposed to Pacific weather systems. Wind speeds regularly reach 40-60 km/h, with gusts exceeding 80 km/h during storms. Wind chill dramatically affects perceived temperature.
Precipitation: Light rain turns to sleet or snow above 3,000 meters even during summer. Heavy rain can make trails dangerously slippery. Thunderstorms pose lightning risk on the exposed upper sections.
Visibility: Clouds frequently envelope the mountain, reducing visibility to mere meters. Summit sunrise viewing success rate hovers around 30-40% depending on season timing.
Check official Fuji weather forecasts starting 3-5 days before your planned climb. Be prepared to reschedule if severe weather approaches—summit success means nothing if safety is compromised.
Starting Point: Fuji Subaru Line 5th Station (2,305m) Ascent Time: 6-7 hours Descent Time: 3-4 hours Total Elevation Gain: 1,471 meters Mountain Huts: 16 huts plus 2 first aid stations
Why it’s popular:
Drawbacks:
Best for: First-time climbers, families, anyone prioritizing safety and support over solitude.
I consistently recommend Yoshida for international travelers. The infrastructure, English resources, and support systems dramatically reduce stress for those unfamiliar with Japanese mountain culture.
Starting Point: Fujinomiya 5th Station (2,400m) Ascent Time: 4.5-6 hours Descent Time: 2.5-3.5 hours Total Elevation Gain: 1,376 meters Mountain Huts: 8 huts
Why it’s attractive:
Drawbacks:
Best for: Experienced hikers in good physical condition who prioritize efficiency and can handle steep grades.
The Fujinomiya route’s steepness shouldn’t be underestimated. While distance is shorter, the sustained climbing intensity exceeds Yoshida. Consider your knee health—descent on this route is particularly demanding.
Starting Point: Subashiri 5th Station (1,970m) Ascent Time: 6-7 hours Descent Time: 3-4 hours Total Elevation Gain: 1,806 meters Mountain Huts: 7 huts
Why it’s appealing:
Drawbacks:
Best for: Hikers seeking quieter experience with nature immersion while still having reasonable infrastructure.
The Subashiri descent is my personal favorite—sliding down volcanic sand feels like moon-walking. However, prepare for sand in absolutely every piece of equipment and clothing.
Starting Point: Gotemba 5th Station (1,440m) Ascent Time: 7-10 hours Descent Time: 3-5 hours Total Elevation Gain: 2,336 meters Mountain Huts: 4 huts (concentrated near 7th-8th stations)
Why people choose it:
Drawbacks:
Best for: Experienced hikers seeking challenge and solitude, physically fit climbers wanting the “full mountain” experience.
Only attempt Gotemba if you’re genuinely prepared for 10+ hour mountain days. I’ve seen too many overconfident hikers struggle on this route. It’s not technical, but it’s relentless.
1. Waterproof hiking boots (ankle support)
Sneakers and running shoes don’t cut it. You’re walking on loose volcanic rock, navigating rocky scrambles, and potentially encountering rain that turns trails into streams.
Boots must be:
Rental options exist at 5th stations (¥3,000-¥4,000), but sizing can be problematic for larger Western feet. Bring your own if possible.
2. Rain jacket and pants (separate pieces)
A rain poncho doesn’t work on Fuji. Wind shreds them within minutes. You need:
Even if forecasts show clear skies, pack rain gear. Fuji creates its own weather, and afternoon storms materialize from nowhere. I’ve personally experienced sunshine to sideways sleet in under 20 minutes.
Rental available: ¥2,000-¥3,000 for jacket and pants set.
3. Layered clothing system
Base layer (synthetic or merino wool, never cotton):
Mid-layer (insulation):
Outer layer:
Additional warmth:
Summit temperatures regularly hit 0-5°C even in August. Add wind chill, and it feels like -10°C. I’ve seen summer climbers shivering uncontrollably at sunrise, wearing only t-shirts under rain jackets. Don’t be that person.
4. Headlamp with extra batteries
Night climbing requires reliable lighting. Your headlamp must:
Pack spare batteries in waterproof bags. Cold temperatures drain batteries faster than expected.
If climbing for sunrise, you’ll hike 3-5 hours in complete darkness. A dead headlamp on a steep volcanic trail means you’re stuck until dawn—potentially dangerous if weather deteriorates.
5. Backpack (25-35 liter capacity)
Your pack carries:
Features needed:
Rental: ¥1,000-¥2,000
6. Trekking poles
Not optional despite what some websites claim. Poles reduce knee stress by 25-30% on descent—crucial on volcanic rock trails.
Collapsible poles work best for travel. Adjust length so forearms stay parallel to ground when poles contact terrain.
The wooden “Fuji sticks” sold at 5th stations work as souvenirs (you brand them at each station for ¥200), but they’re terrible for actual climbing support. Bring real trekking poles.
Rental: ¥1,000-¥1,500
Climbing helmet: Loose rocks fall frequently, especially when other climbers above kick stones. Helmets protect against potentially serious head injuries.
Free helmet lending services exist at Yoshida and Fujinomiya 5th stations. Take advantage of this—brain injuries end trips permanently.
Gaiters: These fabric guards cover the gap between boots and pants, preventing volcanic sand from filling your boots. Trust me on this—climbing with boots full of sharp volcanic gravel is miserable.
Sun protection:
UV radiation intensifies with elevation. Sunburn happens faster at 3,000+ meters.
Portable oxygen canisters: Altitude sickness affects roughly 30-40% of climbers. Supplemental oxygen alleviates symptoms quickly.
Available at 5th stations and mountain huts (¥1,000-¥1,500). One canister provides 20-40 breaths. Carry two if you’re prone to altitude issues.
Water needs: 2-3 liters minimum for the entire climb. Options:
I recommend starting with 1 liter, refilling at your overnight hut, then carrying 1.5 liters for summit push and descent.
Food requirements:
Mountain huts serve curry rice, ramen, and simple meals (¥800-¥1,500). Food quality varies but calories count more than taste at altitude.
Pack more snacks than you think necessary. Altitude suppresses appetite, but your body needs fuel. Force eating even when not hungry.
Skip these commonly over-packed items:
Every kilogram carried requires additional energy. Pack efficiently.
Mountain huts aren’t hotels. They’re survival shelters with minimal amenities designed to keep climbers safe overnight.
What to expect:
What NOT to expect:
Reservations for 2026 season open between late March and early April. Popular huts sell out within weeks for peak season weekends.
Booking process:
Some huts now accept online bookings through third-party platforms. Websites like Fujisan Hotel list available huts with English booking interfaces.
Costs: ¥7,000-¥10,000 per person with two meals. ¥5,000-¥6,000 without meals.
For sunrise viewing, book huts at:
These elevations position you 1-2 hours below summit, allowing departure at 2-3 AM for 4-5 AM summit sunrise arrival.
Too high: 9th station or higher means minimal acclimatization time and potential overcrowding at summit
Too low: 6th or low 7th station requires 4-5 hour night climbs, increasing exhaustion and safety risks
I recommend 8th station huts for optimal balance—enough elevation gain to acclimatize but manageable summit distance.
Check-in: Usually 14:00-20:00. Late arrivals may forfeit dinner (served 17:00-20:00).
Dinner: Simple but filling. Curry rice is standard. Eat everything—your body needs calories.
Sleep schedule: Lights out at 20:00-21:00. Everyone sleeps in full hiking clothes. Wake-up call at 1:00-2:00 AM for summit push.
Breakfast: Light meal around 1:30-2:00 AM before departure. Often instant ramen or rice balls.
Etiquette:
Reality check: You’ll get 3-5 hours of broken sleep maximum. Accept this going in. Exhaustion is part of the experience.
Don’t start climbing immediately upon arrival. Spend 30-60 minutes at the 5th station allowing your body to adjust to 2,000+ meter elevation.
Walk around, hydrate, use toilets, organize gear. Rushing into climbing increases altitude sickness risk dramatically.
Typical schedule (overnight climb with sunrise):
Day 1:
Day 2:
Total climbing time: 12-14 hours spread across two days.
“Slowly, slowly” (yukkuri, yukkuri in Japanese) is the Fuji mantra. Climbing too fast guarantees altitude sickness.
Proper pace:
Altitude sickness symptoms:
If symptoms develop:
Pride kills on mountains. If your body says stop, listen.
Starting at 2 AM under headlamp illumination creates surreal atmosphere. You see only the small circle of light ahead plus dozens of other headlamps snaking up the mountain like a glowing necklace.
Night climbing challenges:
Night climbing advantages:
Stay in groups. Maintain visual contact with companions. Communicate regularly about pace and comfort levels.
The summit area accommodates hundreds of climbers during peak sunrise hours. Arrive early (4:00-4:30 AM) to secure good viewing positions.
Summit activities:
Temperatures at summit average 0-5°C in summer. Wind chill can make it feel like -10°C. Have all warm layers accessible.
Sunrise viewing success rate: Approximately 30-40% of climbers actually see clear sunrise. Clouds frequently obscure views. Don’t build your entire trip around this single moment—the journey matters more than the vista.
Descending Fuji is arguably harder than ascending. Gravity pulls you forward into loose volcanic rock. Knee stress intensifies with every downward step.
Descent techniques:
The Yoshida descent route deliberately separates from ascent trail, preventing two-way congestion. The descent path winds through volcanic sand fields where you can slide-step for faster progress—fun but dusty.
Descent time: Typically 3-4 hours from summit to 5th station, but factor 4-5 hours for safety margins. Tired climbers move slower than anticipated.
Your legs will hurt. Your knees especially. Accept this.
Common post-climb issues:
Plan a rest day after climbing. Don’t schedule intense activities. Your body needs recovery time.
Check forecasts religiously starting 3 days before your climb:
Conditions requiring climb cancellation:
Don’t let summit fever override safety judgment. Fuji will still be there next year.
Register these numbers before climbing:
Most mountain huts have emergency communication equipment. Staff can contact rescue services if needed.
Two first aid stations operate on Yoshida Trail (7th and 8th stations) staffed by medical personnel during peak season. They treat:
Services are free but limited to basic care. Serious emergencies require helicopter evacuation.
Helicopter rescues happen regularly on Fuji—primarily for severe altitude sickness, falls, heart problems, and hypothermia.
Rescue costs: ¥500,000-¥2,000,000+ depending on severity and weather conditions. Your mandatory ¥4,000 climbing fee includes basic insurance but doesn’t cover full rescue expenses.
Critical importance of travel insurance: Purchase comprehensive coverage including:
I cannot overemphasize this. Medical evacuations from Fuji can financially devastate uninsured climbers.
Most international travelers spend ¥35,000-¥45,000 total including transportation, accommodation, fees, and incidentals.
You don’t need marathon-level fitness, but Mount Fuji isn’t a casual weekend stroll either.
Minimum fitness baseline:
Recommended pre-climb training (8-12 weeks):
Weeks 1-4:
Weeks 5-8:
Weeks 9-12:
Final week before climb:
Age matters less than fitness level. I’ve guided fit 65-year-olds who summited easily and struggled with exhausted 25-year-olds. Honest self-assessment prevents mid-climb disasters.
Mount Fuji is a UNESCO World Heritage Site primarily for cultural significance, not natural beauty. Treat it with appropriate respect.
Carry out all trash. Zero waste bins exist on trails above 5th station. Everything you bring up must come down. Pack zip-lock bags for garbage.
Use designated toilets only. Toilet facilities cost ¥200-¥500 per use—pay it. Natural toilet needs must wait for facilities. Biological waste damages the fragile alpine environment.
Stay on marked trails. Shortcutting switchbacks causes erosion. The zigzag path exists for a reason.
Respect other climbers. Step aside for faster hikers. Keep noise levels reasonable. Share trail space cooperatively.
Fuji is sacred to Shinto and Buddhist practitioners. Summit shrines aren’t mere tourist attractions—they’re active religious sites.
Proper shrine etiquette:
The mountain itself is considered a deity in Shinto belief. Climbing represents spiritual pilgrimage as much as physical challenge for many Japanese visitors.
Q: Can beginners climb Mount Fuji? A: Yes, with proper preparation. Mount Fuji requires no technical climbing skills—it’s a challenging hike, not mountaineering. However, beginners should train adequately, bring appropriate gear, and ideally climb during peak season when maximum support infrastructure operates.
Q: How long does it take to climb Mount Fuji? A: Typical climbers take 6-8 hours ascending, 3-4 hours descending. Most spread this over two days with overnight hut stay. Total experience including rest time spans approximately 18-24 hours from 5th station departure to return.
Q: Do I need a guide to climb Mount Fuji? A: Not required. Trails are well-marked, thousands climb independently, and infrastructure supports self-guided climbing. However, first-time climbers, those uncomfortable with Japanese language/culture, or anyone wanting educational context benefit from guided tours.
Q: What’s the success rate for reaching the summit? A: Approximately 70-80% of climbers who start reach the summit. Main reasons for turning back include altitude sickness, exhaustion, and severe weather. Proper pacing and acclimatization dramatically improve success odds.
Q: Can I climb Mount Fuji in one day without staying overnight? A: Technically yes under new regulations, but only between 3 AM – 2 PM. You cannot climb after 2 PM without mountain hut reservations. One-day climbs require starting extremely early (3-4 AM) and maintaining aggressive pace—significantly increasing altitude sickness risk. Not recommended for most climbers.
Q: What happens if I get altitude sickness? A: Stop climbing immediately. Rest, hydrate, and use supplemental oxygen if available. If symptoms persist or worsen, descend to lower elevation. Mountain hut staff and first aid stations can assist. Severe cases may require emergency evacuation.
Q: Is cell phone service available on Mount Fuji? A: Yes, major Japanese carriers (NTT Docomo, SoftBank, au) provide coverage on most routes, though signal strength varies. Don’t rely exclusively on phones for navigation or emergency communication—bring backup plans.
Q: Can children climb Mount Fuji? A: Children as young as 8-10 years regularly summit with proper preparation. Consider your child’s fitness level, hiking experience, and ability to handle discomfort. The overnight schedule disruption, altitude effects, and physical demands challenge many children. Start conservatively—if they struggle on lower sections, don’t force summit attempts.
Q: What’s the youngest/oldest person to summit? A: Children under 5 have summited (not recommended), and climbers in their 80s successfully reach the top annually. Age matters less than current fitness, health status, and preparation.
Q: Are there showers or baths at mountain huts? A: No. Huts provide sleeping space and meals only. No bathing facilities exist. Bring wet wipes for basic hygiene. Post-climb onsen (hot spring bath) becomes incredibly appealing after 24 hours of hiking and sweating.
Q: Can I see the sunrise without climbing to the summit? A: Yes. Sunrise viewing from 8th station huts offers spectacular perspectives without summit crowds. Some climbers intentionally stop at 8th station, enjoy sunrise, then descend—perfectly valid approach avoiding summit congestion.
Q: What if weather turns bad during my climb? A: Assess conditions honestly. Light rain is manageable with proper gear. Heavy rain, strong winds, or lightning require descent. Mountain huts provide shelter if you’re caught in storms. Don’t summit in dangerous conditions—the mountain will still be there next time.
Q: Is camping allowed on Mount Fuji? A: No. Camping is strictly prohibited throughout the mountain. All climbers must either complete ascent/descent in one day or stay in mountain huts. This regulation protects the fragile alpine environment and manages climber safety.
Q: How crowded does it actually get? A: During peak season (late July-August, especially Obon week), expect significant crowds. Summit areas can have 100+ people simultaneously. Yoshida Trail sees queue lines at certain sections. Early July and early September offer 40-50% fewer climbers. Night climbing on any date creates less congestion than afternoon/evening starts.
Q: What’s the best route for first-time climbers? A: Yoshida Trail. Maximum infrastructure, most English support, separate ascent/descent paths, and greatest mountain hut density make it ideal for international first-timers despite being most crowded.
Q: Can I bring drones? A: Flying drones on Mount Fuji is prohibited. Japan has strict drone regulations, and national parks specifically ban them to prevent wildlife disturbance and safety issues.
Q: Are there bears or dangerous animals? A: No bears on Mount Fuji. The alpine environment above tree line supports minimal wildlife. Main animal concerns are insects at lower elevations. Carry basic insect repellent for 5th-6th station forested areas.
Q: What happens to my trash? A: You carry it out. No waste bins exist on trails. Mountain huts accept minimal trash from overnight guests. Bring zip-lock bags for all garbage and pack it down to 5th station disposal facilities.
| Climb | Elevation | Technical Difficulty | Time Required | Season Length | Cost (USD) |
|---|---|---|---|---|---|
| Mount Fuji (Japan) | 3,776m | Non-technical hike | 12-14 hours | 2 months | $170-$340 |
| Kilimanjaro (Tanzania) | 5,895m | Non-technical trek | 5-9 days | Year-round | $1,500-$4,000+ |
| Mount Kinabalu (Malaysia) | 4,095m | Non-technical scramble | 2 days | Year-round | $200-$400 |
| Half Dome (USA) | 2,694m | Strenuous hike + cables | 10-14 hours | May-Oct | $50-$150 |
| Matterhorn (Switzerland) | 4,478m | Technical mountaineering | 2-3 days | July-Sept | $2,000-$4,000 |
| Cotopaxi (Ecuador) | 5,897m | Glacier mountaineering | 2 days | Year-round | $300-$600 |
Mount Fuji’s unique position: Accessible to fit beginners, extensive infrastructure, cultural significance, short climbing window, and iconic status create experience unlike any other mountain.
Within 24 hours:
Days 2-3:
Traditional Japanese hot springs near Fuji’s base provide perfect recovery therapy. Mineral-rich waters soothe sore muscles while offering cultural immersion.
Nearby onsen towns:
Day-use onsen typically cost ¥800-¥2,000. Overnight ryokan stays with meals run ¥15,000-¥30,000 per person.
Onsen etiquette reminder:
The contrast between Fuji’s volcanic rock and hot spring luxury creates memorable bookends to the climbing experience.
Official summit certificates (¥1,000) can be purchased at:
Certificates include your name, climbing date, and official stamp. Many climbers frame them as lasting mementos.
The traditional wooden walking stick (¥1,000-¥1,500) purchased at 5th station serves as both functional aid and rolling souvenir. Each mountain hut and station offers branding services (¥200-¥300 per brand) burning unique marks into your stick.
By summit, your stick displays 10-15 brands documenting your journey. It’s touristy, yes, but also a tangible record of your accomplishment.
Appreciate Fuji’s majesty without summiting. The northern lake region offers spectacular views and outdoor activities:
Lake Kawaguchiko: Most developed lake with museums, ropeway, cruise boats, and countless photo opportunities. Cherry blossoms in April and autumn colors in November frame Fuji beautifully.
Lake Yamanakako: Largest lake, more peaceful than Kawaguchiko. Cycling paths, campgrounds, and water sports.
Chureito Pagoda: Famous five-story pagoda with iconic Fuji backdrop. Peak cherry blossom season creates Instagram-famous scenes.
The Tokaido Shinkansen between Tokyo and Kyoto provides extended Fuji viewing from train windows. Right-side seats heading southwest offer best perspectives. Views last approximately 15-20 minutes near Shin-Fuji Station.
The slower Fujikyu Railway from Otsuki to Kawaguchiko delivers deliberate Fuji sightseeing with vintage observation cars and themed trains.
While summer climbing attracts adventurers, winter Fuji captivates photographers. Snow-capped symmetrical peaks against brilliant blue skies create Japan’s most photographed landscape.
Prime viewing: December through February from Lake Kawaguchiko, Oshino Hakkai village, or Shizuoka tea fields.
Mount Fuji isn’t the world’s most beautiful mountain. It’s not the highest, remotest, or most challenging. What makes Fuji special transcends physical characteristics.
This mountain represents something deeper—cultural icon, spiritual symbol, personal challenge, and shared human experience. When you stand on that summit at dawn, surrounded by dozens of strangers from every continent, you participate in a tradition spanning centuries.
I’ve guided climbers who cried at the summit. Others felt nothing beyond relief it was over. Both reactions are valid. Your Fuji experience belongs entirely to you.
The preparation matters more than you realize. Every training walk, each piece of researched gear, all the planning and preparation—these transform a tourist activity into genuine accomplishment. Don’t shortcut the process.
Will it be hard? Yes. Your legs will hurt, you’ll be tired, altitude might make you nauseous. The weather might not cooperate. Your mountain hut might be crowded and uncomfortable. These challenges are features, not bugs—they’re why summiting means something.
But you’ll also experience things impossible to fully convey: the surreal beauty of hundreds of headlamps snaking up a dark mountain, the communal silence as the sun breaks the horizon, the strange satisfaction of pushing your body beyond comfortable limits, and the quiet pride of knowing you climbed Japan’s highest peak.
Mount Fuji climbing guide 2026 provides the roadmap. Actually making the journey? That’s entirely up to you.
The mountain waits. It’s waited for millions of years, and it’ll wait for you. But 2026’s climbing season spans only two months. The decision timeline is shorter than the mountain’s patience.
Start planning. Train consistently. Respect the mountain and prepare thoroughly. And when you finally stand at that summit marker reading “3,776 meters,” take a moment to appreciate not just the view, but the entire journey that brought you there.
Fuji-san welcomes you. Climb well, climb safely, and carry the experience forward long after volcanic dust washes from your gear.
Ready to climb Mount Fuji in 2026? Contact our Japan adventure specialists who can arrange mountain hut bookings, gear rental coordination, transportation logistics, and optional guided climbing services. We ensure you’re fully prepared for Japan’s most iconic mountain challenge.
Posted By : Vinay
Latest Article
2nd Floor, 39, Above Kirti Club, DLF Industrial Area, Kirti Nagar, New Delhi, Delhi 110015
Travel Tourister is a leading Travel portal where we introduce travellers to trusted travel agents to make their journey hasselfree, memorable And happy. Travel Tourister is a platform where travellers get Tour packages ,Hotel packages deals through trusted travel companies And hoteliers who are working with us across the world. We always try to find new and more travel agents and hoteliers from every nook and corners across the world so that you could compare the deals with different travel agents and hoteliers and book your tour or hotel with the one you have chosen according to your taste and budget.
Copyright © Travel Tourister, India. All Rights Reserved
 Call
Call Enquiry